FIX A LEAKING TAP
The sooner you get onto fixing a leaking tap, the less money and water you’ll lose down the drain.
Materials Required
12mm (1/2") washers
O-ring
Jumper valve
Tap lubricant
Tools Required
Tap spanner / Wrench set
Pliers
Screwdriver
Cloth
Before getting started, make sure you turn off your water supply at the mains. If you live in a house, your water main will be out on the street or in the front yard. If you live in a flat or townhouse, the mains tap will probably be inside the bathroom or laundry.
Next, turn on the tap being fixed to release any water left in the pipe, then put a plug in the basin to stop any parts falling down the drain as you work.
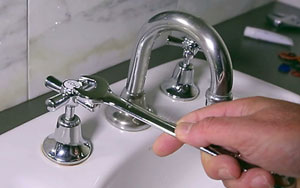
Using a spanner, take off the tap’s cover to remove the handle. You’ll probably find this under the hot or cold sign.
Undo the screw and remove the handle. If the tap has a metal cover, unscrew it by hand, or use a wrench or tap spanner.
Unscrew the tap bonnet, and completely remove the headgear. You should see a large body washer, o-ring and jumper valve. The jumper valve should fall out.
Replace the body washer, the o-ring and the jumper valve with new parts. Apply a tap lubricant to the spindle and valve for better sealing and smoother tap operation.
Refit the bonnet and spindle. Be careful not to over-tighten the nuts.
Put the tap back together, turn it off, and turn the water main back on. Now check the tap to make sure it’s no longer leaking.
If this still doesn’t fix the leak, the tap may need to be re-seating by a plumber, or you can do it yourself with some friendly advice at your local Thrifty-Link Hardware store.
Please Note: Check with your state’s plumbing regulations before carrying out this work, as it may be illegal to complete unlicensed plumbing work, and you may not be covered by insurance.
